Bread Machine vs. Stand Mixer: What’s the Difference?
Freshly baked bread – is there anything better? The aroma that fills your kitchen, the warm, chewy taste of a slice slathered in butter. But how do you achieve that heavenly homemade loaf? You may be wondering whether to invest in a bread machine or a stand mixer. Both allow you to be the baker of your dreams, but they work in different ways. Let’s explore the distinctions between these kitchen appliances. Which one will help you wake up to the smell of just-baked bread? Is a bread maker or mixer better suited to your needs? Get ready to find out as we compare these popular options for home bread baking. Whichever model you choose, your kitchen will soon have that mouthwatering aroma of fresh bread wafting through the air.
Snapshot Summary
Both bread machines and stand mixers have their advantages when it comes to bread making. Bread machines take the effort out of the process – add ingredients and walk away. The machine kneads, proofs, and bakes your dough without work. Stand mixers give you more control and versatility. You can monitor the dough as it mixes and kneads and use a stand mixer for other baking tasks like whipping cream or mixing cookie dough. Ultimately, it comes down to convenience vs. flexibility. A bread maker is the way to go if you want set-it-and-forget-it bread. But if you enjoy the hands-on process and want a multi-purpose appliance, a stand mixer is likely the better choice. Either way, you can go right with fresh homemade bread!
Bread Machines
What is a Bread Machine?
A bread machine, also known as a bread maker, is a kitchen appliance specifically designed to make bread. Bread machines automate the bread-making process by combining mixing, kneading, rising, and baking all in one electric countertop device.
Inside the bread machine, a removable bread pan holds the dough during the bread-making cycle. This bread pan contains a kneading paddle that mixes and kneads the dough as the machine operates. Users add yeast, flour, liquids, and other ingredients to the bread pan, select their settings, and allow the appliance to mix, knead, proof, bake, and sometimes even dispense ingredients automatically.
How Do Bread Machines Work?
Bread machines work by using pre-programmed cycles that automate the bread-making process from start to finish. Here are the key phases of bread machine functionality:
- Mixing – When starting the bread cycle, the paddle mixes together all the ingredients you added to the bread pan. This combines everything into a dough.
- Kneading – After mixing, the paddle kneads the dough, working it to develop gluten. Kneading typically happens in intervals over a 60-90 minute period.
- Rising – Next, the dough enters a proofing or rising phase. The machine maintains the ideal warm environment for the yeast to cause fermentation and rise.
- Baking – Once risen sufficiently, a heating element at the bottom of the pan bakes the dough into a loaf. Baking lasts 30-60 minutes, depending on settings.
- Keeping Warm – Many bread machines have a keep warm cycle that holds the freshly baked bread at an ideal serving temperature for 1-3 hours.
Digital displays and control panels make selecting the loaf size, crust type, and bread type settings easy. Most bread machines take between 2-4 hours to complete a loaf on the full automated cycle.
Common Features of Bread Machines
There are a few key features standard on most bread-making machines:
- Bread pans – The removable non-stick pans come in various sizes from 1-2 pound capacities. Some machines have two pans.
- Control panels – Allow you to select the cycle, crust type, loaf size, and more. It can include buttons or digital interfaces.
- Mixing paddles – Also called kneading paddles, these mix the dough during the bread-making process.
- Viewing windows – Clear tops let you watch the bread as it mixes, rises, and bakes.
- Dimensions – Average about 16″ L x 12″ W x 12″ H to accommodate loaf sizes. It can take up significant counter space.
- Automatic dispensers – Dispense ingredients like yeast, nuts, or fruit automatically during the cycle.
- Cycles – Pre-programmed cycles automate mixing, kneading, rising, and baking. Include options like basic, whole wheat, sweet bread, rapid, gluten-free, jam, dough, cake, and pasta dough.
The Benefits of Using a Bread Machine
There are several advantages that bread machines offer over manually making bread:
- Convenience – Add ingredients, press start, and come back later to fresh bread. No kneading or monitoring is required.
- Consistency – The appliances take out much of the guesswork, giving reliable, consistent results each time.
- Versatility – Can make white, whole wheat, sweet, savory, gluten-free, and fruit bread varieties.
- Customization – Control panels let you adjust crust type, loaf size, and cycles.
- Timing flexibility – Most machines have delayed start, so you can add ingredients and program to bake later.
- Beginner-friendly – Simplifies the overall process, ideal for beginners without kneading experience.
For those short on time or seeking convenience, bread machines deliver homemade loaves with minimal effort required.

Potential Drawbacks to Consider
However, there are some downsides to be aware of with bread machines:
- Single function – Bread machines can really only make bread and dough. They need more versatility compared to stand mixers.
- Size – Units can take up significant counter space with their larger, specialized shape.
- Cost – Quality models range from $100-$200, an investment for a single-function device.
- Texture – The loaves have a more uniform, less artisan-style crumb texture.
- Shape limits – You can only make basic vertical loaf shapes, not rolls, braided breads, etc.
- Quantity – Limited to loaves of 2 pounds or less; not ideal for large batches.
- Noise – Some machines can be noisy during kneading cycles.
For those wanting to make artisan bread or diverse baked goods, the restrictions may need to be revised.
Types of Bread Machines
There are a few key distinctions among the types and models of bread-making machines:
Basic Models
The most affordable and limited-function machines are basic bread makers that automate mixing, kneading, rising, and baking bread dough.
Pros
- Inexpensive, starting around $80-$100
- Good for beginners
Cons
- Fewest feature options
- It can be not quiet during cycles
Advanced Control Models
These offer more sophisticated control panels to customize cycles, crust types, loaf sizes, and more. Advanced models start around $150.
Pros
- Greater ability to customize settings
- Digital interfaces
- More cycles and options
Cons
- More expensive
- Can have overly complex controls
Two Loaf Models
Ideal for larger families, these bread machines bake two loaves in one cycle. Some have two mixing paddles. Two loaf models cost $180-$200.
Pros
- Efficient for making two loaves
- Save time over using single models
Cons
- Typically more expensive
- Very large footprint on the counter
Super Automatic Models
Top-end models have high-tech features like automatic ingredient dispensers, settings for specialty diets like gluten-free, and advanced digital interfaces. Super-automatics start around $200-$300.
Pros
- Convenient dispensers
- Specialized cycles and settings
Cons
- Most expensive machines
- More parts that can break
Consider which features match your budget and preferences when selecting among basic, advanced, two loaves, and super-automatic bread maker models.
Important Features for Comparison
When selecting a bread machine, there are a few key features to compare:
- Number of loaf sizes – Entry models may only have a one or 1.5-pound setting. More advanced machines offer small, medium, and large-size options.
- Kneading paddles – Some have just one paddle, while others have two for more thorough kneading.
- Cycles – Look for diverse cycles like basic, whole wheat, sweet bread, dough, pasta dough, jam, and gluten-free.
- Crust control – The ability to select light, medium, or dark crust is ideal.
- Viewing window – Clear lid tops let you monitor the bread as it bakes.
- Delay timer – Programs the machine to start several hours later. It is useful for setting up before bed to wake to fresh bread.
- Keep warm – Hold the loaf at an optimal serving temp for 1-3 hours after baking.
- Alert tones – Sounds beeps or alarms at certain cycle points. It’s helpful if you’re multitasking in the kitchen.
- Automatic dispensers – Dispense ingredients like nuts, fruit, or yeast for you. Found on higher-end models.
- Digital display – Makes it easy to program and read settings versus buttons and dials.
Consider your priorities when choosing a bread machine with the features that best match your budget and needs.
Useful Accessories and Attachments
There are a few add-on accessories available that enhance bread machine functionality:
- Dough blade – Swaps out the kneading paddle to make a dough that can be shaped and baked in the oven.
- Gluten-free paddle – Alternate paddle designed to process thicker, denser gluten-free doughs.
- Pasta roller attachment – Allows you to use a bread machine to mix pasta dough.
- Bread pan sets – Get additional bread pans to bake back-to-back loaves or different sizes.
- Recipe books – Offer inspiration and instructions tailored specifically to bread machines.
Top Bread Machine Brands
Popular and reputable bread machine brands include:
- Zojirushi – Regarded as the gold standard of bread makers for quality, durability, and performance.
- Cuisinart is a reliable brand with a range of affordable to higher-end models.
- Oster – Known for more budget-friendly basic bread-making machines.
- Breville – Sophisticated machines focused on pre-programmed convenience.
- Hamilton Beach – Classic brand with a range of inexpensive to advanced models.
- Panasonic – User-friendly machines great for beginners.
- Westbend – Made durable, versatile machines equipped with lots of custom cycles.
Do some research to choose a maker from a top brand that fits both your budget and bread preferences.
Useful Tips for Using Bread Machines
Follow these pointers to get the most out of your bread machine:
- Carefully measure ingredients for the best results. Use scales for the most accuracy.
- Check that the yeast is fresh and active. Expired yeast can prevent rising.
- Time dry and wet ingredients to mix separately before combining.
- Allow dough cycles to fully knead and rise before baking to develop flavor.
- Take advantage of delay timers to wake up to freshly baked bread.
- Avoid excess kneading by using the dough cycle, then shaping and baking in the oven.
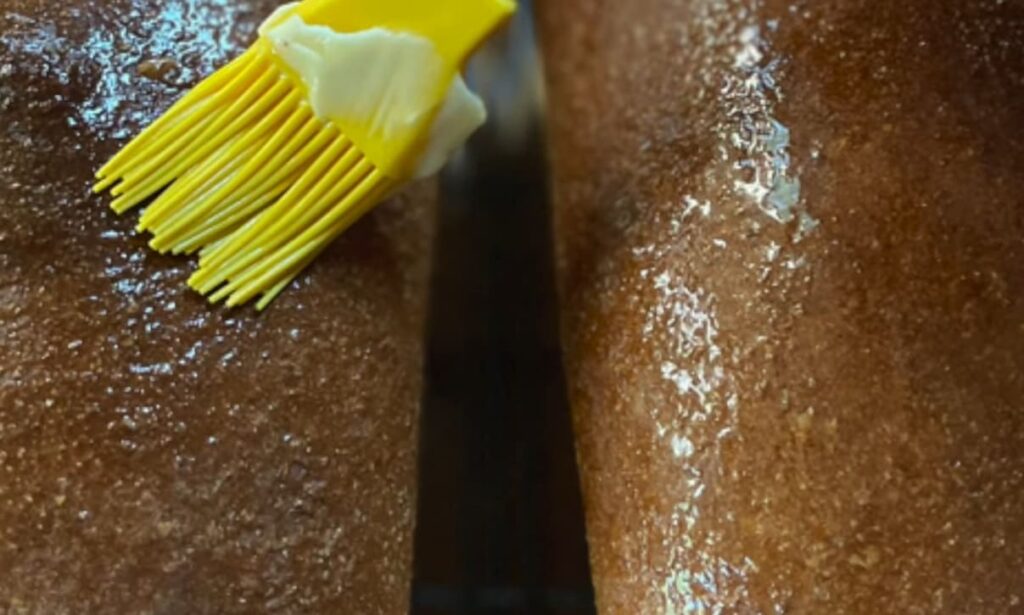
- Brush finished loaves with butter or oils for a nice sheen.
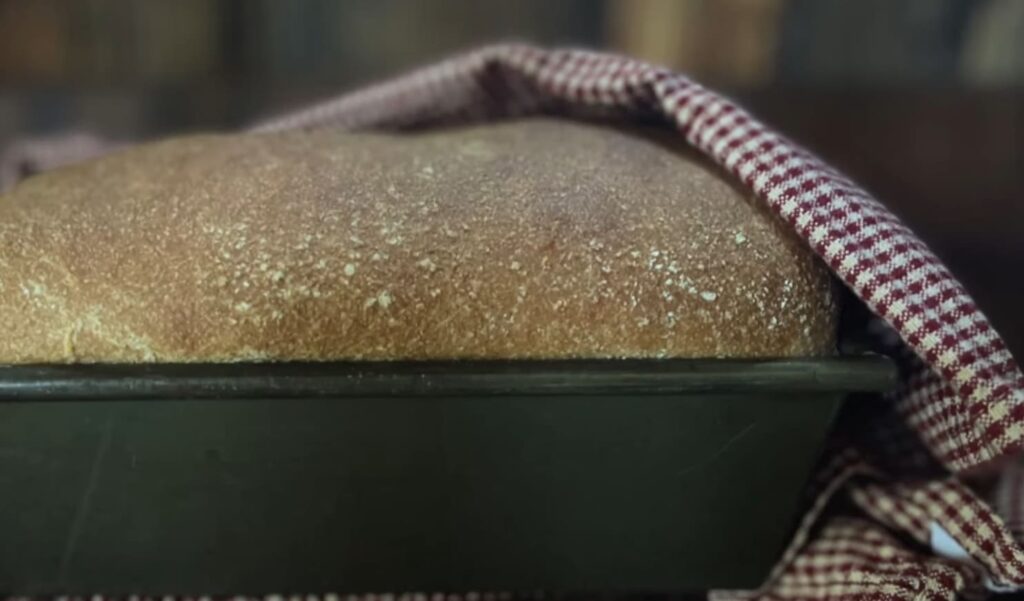
- Cool bread fully on a rack before slicing to prevent a gummy texture.
With some practice and experimentation, you’ll be an expert in making delicious bread at home with ease.
Stand Mixers
What is a Stand Mixer?
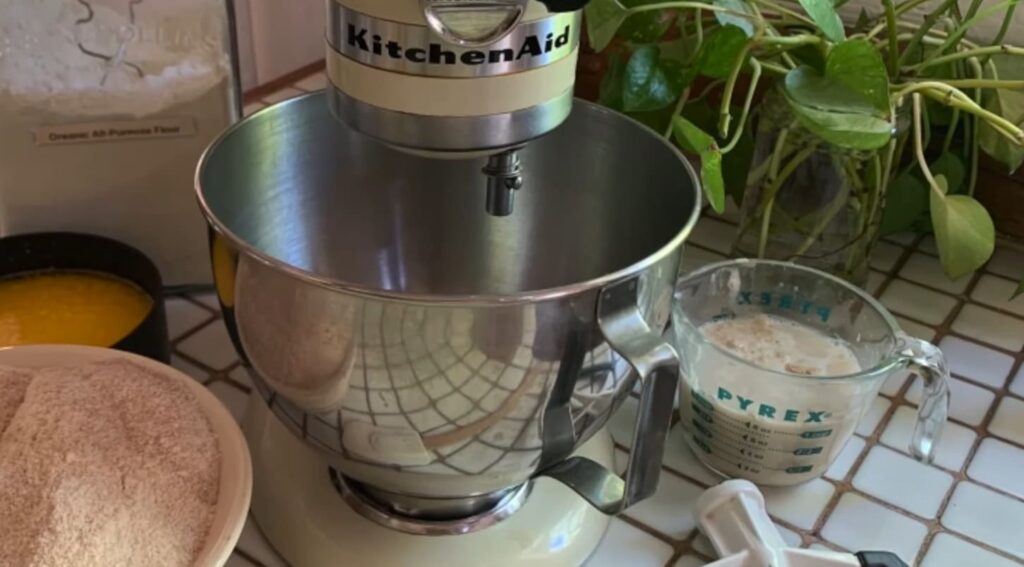
A stand mixer is a versatile kitchen appliance used for mixing, kneading, beating, and whipping ingredients. Stand mixers consist of a motorized base that powers detachable accessories to take the effort out of food preparation tasks.
The key components include the motor base, mixing bowls, and attachments. The motor base houses a powerful motor to turn the attachments. Stainless steel or glass bowls fit onto the base to hold ingredients. Common attachments are the dough hook, wire beaters, and whisk.
To use a stand mixer, you fit the bowl and attachment onto the base, add ingredients to the bowl, and mix at various speeds hands-free. This allows you to knead dough efficiently, beat frosting, whip cream, and more.
How Do Stand Mixers Work?
Stand mixers use their strong motor and attachments to automate mixing tasks:
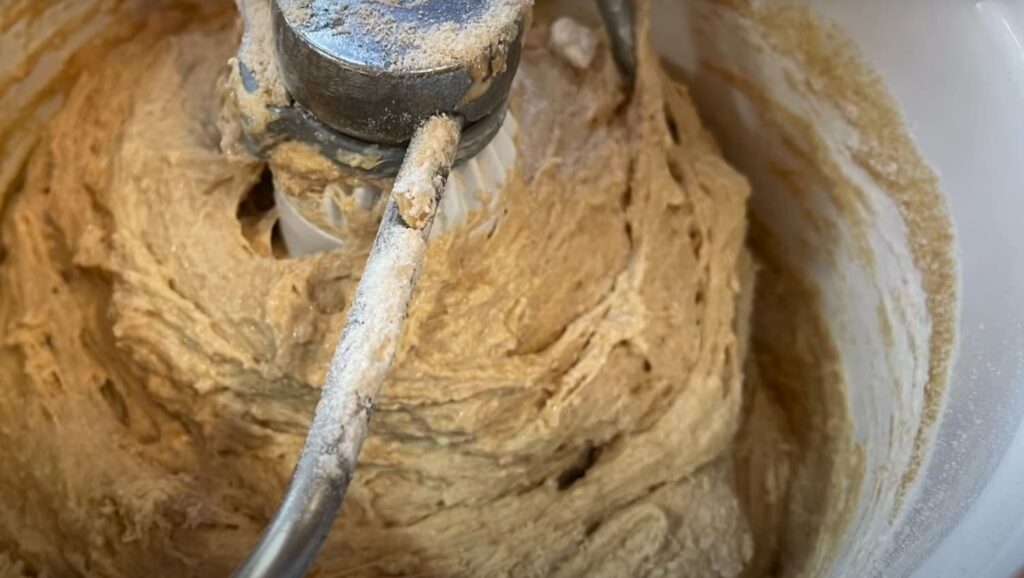
- Kneading – The dough hook works yeast dough to develop gluten.
- Creaming – The beaters cream together butter and sugar.
- Beating – The beaters thoroughly combine batters.
- Whipping – The whisk whips egg whites or cream.
- Mixing – Low speeds, gently stir and fold ingredients.
- Mashing – The beaters mash vegetables.
Stand mixers provide power and convenience for essential kitchen jobs.
The Benefits of Using a Stand Mixer
There are many advantages to stand mixers:
- Versatility – Can mix, knead, beat, whip, mash, and more.
- Capacity – Makes large batches of dough or batter.
- Power – Motor strength to knead stiff doughs with ease.
- Hands-free – Does the hard work for you?
- Time savings – Quickly kneads and mixes instead of manually.
- Consistent results – Gives reliable, even mixing.
For avid bakers making large batches, stand mixers are indispensable.
Potential Drawbacks
However, some downsides exist:
- Expensive – Quality stand mixers often cost over $200.
- Learning curve – Taking time to learn mixing techniques.
- Manual effort – You still need to monitor dough and start/stop.
- Heavy – Units can weigh 15-30 pounds.
- Storage – Bulky shapes and accessories take up space.
- Noise – Can be quite loud during operation.
For those wanting a simple bread machine, stand mixers require more work.
Types of Stand Mixers
There are three main types of stand mixers:
Tilt-Head
The head tilts back for adding bowls/attachments on these popular models. Often include a pouring shield.
Pros
- Convenient head tilting
- Typically more affordable
Cons
- You can move around if the head isn’t locked
- Exposed bowl during mixing
Bowl-Lift
A lever lifts the bowl to the fixed mixing head. Bowls have handles to assist lifting.
Pros
- Keeps bowl securely in place
- Provides sturdy mixing
Cons
- Heavy bowls require effort to lift
- Leverlifting is an extra step
Commercial
Made for heavy daily use with a rugged steel body and high-powered motor. Used by professional bakers.
Pros
- Very durable, powerful motor
- Huge 10-20 quart bowls
Cons
- Bulky, heavy, and expensive
- Overkill for home use
Important Features to Compare
Key features to evaluate when selecting a stand mixer include:
- Motor power – 300-325 watts is sufficient for most; 500+ for commercial use.
- Speed settings – 10+ speeds allow precision mixing control.
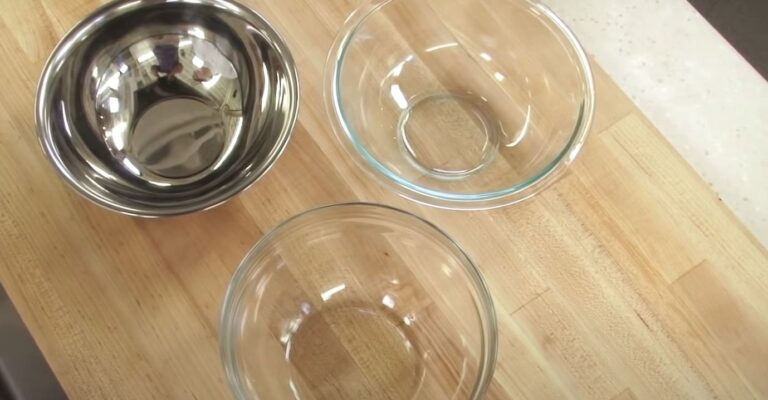
- Bowl material – Stainless steel and aluminum are the most durable. Some are glass.
- Bowl capacity – Standard is 4-5 quarts. Larger 6+ quart bowls are available.
- Included attachments – Check that all necessary accessories are included.
- Tilting head – Head tilts back for easy bowl access on most affordable models.
- Accessory hub – Allows adding attachments like pasta rollers, meat grinders, etc.
Consider your planned uses and choose features accordingly. Prioritize power, capacity, and accessories.
Useful Accessories and Attachments
- Extra bowls – For quickly switching between tasks without stopping to wash bowls.
- Splash guard – Prevents messy ingredient splatters during mixing.
- Extra attachments – Expand functionality with pasta rollers, meat grinders, spiralizers, etc.
- Bowl scraper – Silicone scraper fits on a hub to scrape bowls cleanly.
- Storage cases – Protects mixer and attachments from dust. Helpful for tidy storage.
Top Stand Mixer Brands
Well-known stand mixer brands include:
- KitchenAid – The gold standard, renowned for quality and performance. Wide accessory selection.
- Bosch – Powerful German engineering, famously quiet motors. Great for occasional heavy loads.
- Breville – Sleek design with thoughtful details like auto-shutoff. Budget to high-end options.
- Cuisinart – Reliable workhorse mixers, good value for casual baking.
- Hamilton Beach – Basic, affordable mixers ideal for lighter mixing tasks.
Research brands to find the right balance of quality, capabilities, and price to suit your needs.
Tips for Using Stand Mixers
Follow these tips when using your stand mixer:
- Set out all ingredients/tools beforehand for efficient adding.
- Always start mixing at the lowest speed to avoid splashing.
- Slowly increase speeds to prevent attachment “climbing” out of the bowl.
- Periodically stop and scrape down the sides/bottom of the bowl.
- Add more flour if the dough is sticking to the hook and riding up.
- Lightly oil the bowl and hook first for sticky dough.
With practice, you’ll learn techniques for mess-free, efficient stand mixer use.
Common Stand Mixer Uses
Stand mixers excel at tasks like:
- Kneading yeast bread dough
- Making pizza and pretzel dough
- Whipping silky frostings
- Creating fluffy meringue
- Beating cake batters
- Mixing muffins and cookies
- Whipping cream
- Mashing vegetables like potatoes
Explore all the possibilities!
FAQs
How do they compare for effort and difficulty?
Bread machines require virtually no effort. You add ingredients, push a button, and come back later to fresh bread. Stand mixers involve more hands-on work like properly kneading, monitoring dough consistency, shaping loaves, and baking. For true beginners, bread machines offer foolproof bread-making.
How do they compare for versatility?
Stand mixers are far more versatile since they can also make cakes, cookies, frosting, pasta, and more using various attachments. Bread machines can really only make bread, with very limited ability for other doughs and batters. If you want an appliance for diverse baking tasks, a stand mixer is the clear choice.
How do they compare for quantity and loaf size?
Stand mixers can make very large batches of dough, up to 8 loaves, while standard bread machines max out at loaves of 2 pounds or less. However, there are “2 lb” bread machine models available that can bake two loaves in one cycle. For feeding large families fresh homemade bread, a stand mixer’s capacity beats a typical bread maker.
What kinds of bread can each make?
Bread machines can bake classic loaves like white, whole wheat, herb and cheese, and fruit bread. Gluten-free is possible but can be tricky in bread machines. Stand mixers, since you shape and bake loaves yourself, allow for more artisan bread varieties like baguettes, boules, rolls, and creative shapes.
What about dough types like pizza and pretzels?
You can make basic pizza and pretzel dough in a bread machine, but the quantity is limited. A stand mixer equipped with a dough hook attachment excels at making large batches of risen dough for pizza, soft pretzels, and similarly shaped bread. The robust motor kneads stiff dough thoroughly. You might be interested in reading about pizza dough mixers.
Which allows more customization?
Stand mixers provide more customization ability since you manually control the process rather than relying on pre-programmed settings. You can adjust for factors like humidity that affect dough or bake for longer/shorter times. Bread machines limit you to automatic cycles. For advanced bakers, stand mixers give more control.
How do they compare for convenience?
Bread machines win for pure convenience. After adding ingredients, they do everything for you, from kneading to baking automatically. Stand mixers require you to monitor dough, shape loaves, and bake yourself in addition to the mixing. For perfectly hands-off bread making, nothing beats a bread machine.
How do they compare for price and value?
Quality stand mixers often cost around $200+, but their versatility provides great value since they can be used for far more than just bread. Bread machines range from $80 for very basic models and $150-$300 for higher-end versions with more features and settings. If your sole focus is making bread, a bread machine may provide better value.
Related Video: KitchenAid vs Bosch vs Ankarsrum: Best Mixer for Bread Dough
Summing Up
When deciding between a bread machine and a stand mixer, consider your goals and baking style. Bread machines simplify the process with pre-programmed settings but offer less flexibility. Stand mixers allow creativity and control, though they require more effort. Those wanting purely convenience may prefer a bread maker to churn out loaves with little input. Enthusiasts who enjoy technique and customization will value the versatility of a stand mixer. Whichever appliance you choose, both allow homemade bread with far less effort than kneading by hand. Let your priorities and passion for baking guide you. With the right tool, you’ll be delighting in the smell of freshly baked bread in no time. Both options have their place in any baker’s kitchen!