How to Sharpen Blender Blades?
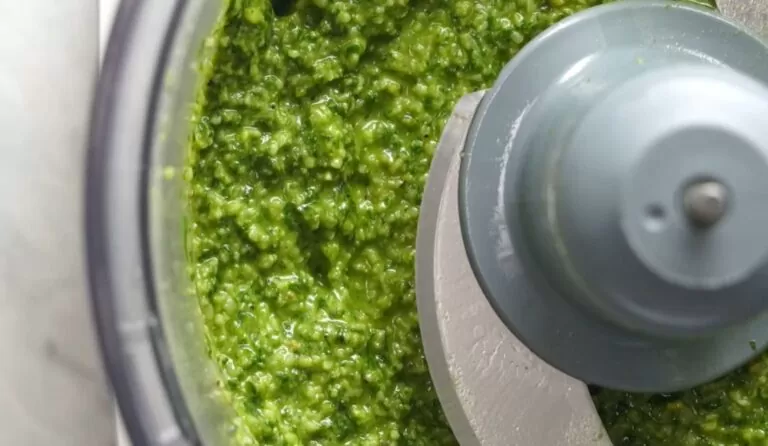
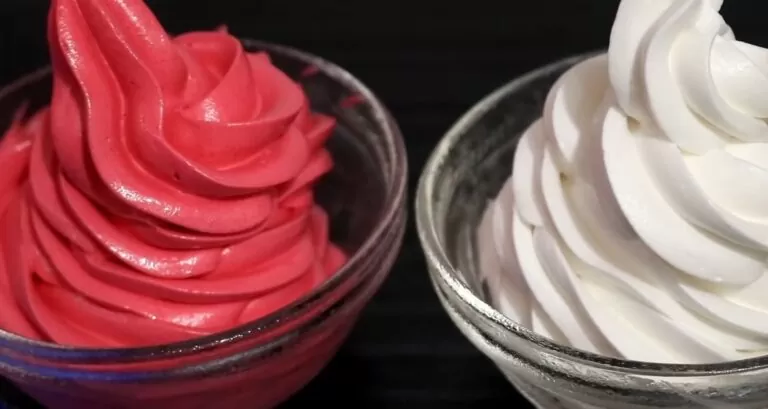
A dull blender blade can be extremely frustrating. No matter how long you blend, your smoothies come out chunky, and your soups come out lumpy. While it may seem easier to buy a new blender, sharpening the existing blades can save you money and extend the life of your appliance. Sharpening blender blades is an easy process that anyone can do at home with just a few simple tools. In this short guide, you’ll learn some tips and tricks for getting your blender blades razor-sharp again. With a little effort, you can restore peak performance to your blender and return to whipping up creamy concoctions in no time. Keep reading to transform your dull blades and make your blender work like new again!
Quick Summary
Sharpening dull blender blades is a simple process that can be done at home. You only need a whetstone, lubricating oil, and a screwdriver. Just be sure to disassemble the blender safely first and remove the blades. Give the blades a good clean, then sharpen the edges using smooth, even strokes with the whetstone held at a 20-degree angle. Finish up by carefully checking for nicks, reassembling the blender, and testing the blades. With a little time and focus, you can revive your blender blades to regain superior blending performance.

Step 1: Disassemble the Blender
Before sharpening the blades, remove them from the blender jar. This crucial first step allows you to safely access and handle the blades for sharpening. While blender models vary, disassembly usually requires a Phillips-head screwdriver and patience. Take proper precautions and follow the manufacturer’s instructions to detach the blades intact.
Unplug and clean
- Always unplug the blender from the power source before disassembling it to prevent accidental turning on.
- Wash and dry the blender jar thoroughly before disassembly. Removing sticky residue will make cleaning easier after sharpening.
Locate screw cap
Examine the underside or bottom of the blender jar to find the screw cap that covers the blade assembly. This is usually a ring with either small screws or larger bolts.
Loosen screws
- Place a thick towel on a work surface and carefully turn the jar upside down.
- Loosen the screws or bolts, securing the screw cap using a Phillips screwdriver. Loosen slowly and carefully.
Remove the cap and blades
- Once loose, unscrew and remove the cap to expose the blades underneath.
- Use a folded towel to grip and lift out the blade assembly. This prevents cutting your fingers on the sharp edges.
Separate blades if needed
Some blenders have removable blades that easily slip off a central piece. Others have blades fixed permanently together.
If removable, take care to keep track of which blades go where to reassemble properly later.
Now, the blades are detached from the blender and ready for sharpening. Take precautions when handling the naked blades and keep parts organized. Reassembly after sharpening is much easier when you disassemble carefully beforehand.
Step 2: Clean the Blades
Before sharpening can begin, the blender blades need to be thoroughly cleaned. Any leftover residue, sticky spots, or built-up debris on the blades can impede sharpening. Properly cleaning the blades also avoids transferring unwanted dirt and grime back into your blender after sharpening.

Wash blades individually
If the blades detach separately, wash each individually under hot running water. Target any visible buildup and use a soft brush or sponge to help remove it.
Soak blades
For stubborn debris and stains, allow the blades to soak in hot, soapy water for 10-15 minutes. Use mild dish soap and scrub with a soft-bristled brush.
Rinse blades
Rinse all soap residue off the blades completely. It helps to rinse each side individually, ensuring all soap is washed away.
Dry blades thoroughly
Dry the blades completely with a clean, soft towel. Take care to pat dry any crevices where water can collect. Let sit for 10-15 minutes to air dry as well.
Proper cleaning allows you to inspect the blades for any nicks or damage hidden by debris. It also provides the clean slate needed for the sharpening whetstones to be fully effective on the blade edges.
Avoid dishwasher
Do not put detached blender blades in the dishwasher, as they can get damaged. Hand washing gives you more control.
Meticulous cleaning of the blades is time well spent on creating the perfect surface for sharpening.
Step 3: Choose a Sharpening Method
When it comes to sharpening blender blades, you have a couple of options for the specific sharpening method. Choosing the best technique for your needs and skill level will yield the best results. The two main methods are using a whetstone or a handheld file.
Whetstone
Whetstones, or sharpening stones, are rectangular blocks of materials like silicon carbide or aluminum oxide. They come in varying grits, from coarse to fine.
Advantages:
- Produces very sharp, smooth edges
- It gives you more control over the sharpening process
- It can be used repeatedly
Disadvantages:
- Requires learning proper sharpening techniques
- It can take longer, especially for first-timers
Handheld File
These metal files are shaped to fit inside the blade curves and sharpen the edges. Look for a set made for blender blades.
Advantages:
- Very easy and straightforward to use
- Faster sharpening compared to whetstones
- Good for occasional use
Disadvantages:
- Do not sharpen blades to as fine of an edge
- Files wear out after frequent use
- Less control over the pressure applied
For most home use, a good quality whetstone is recommended for sharpening blender blades. Take your time to master the technique, and it will provide superior, long-lasting results. However, a handheld file is a quicker and simpler option for occasional sharpening.

How to Sharpen Blender Blades?
Now, it’s time for the sharpening itself. The techniques vary slightly depending on whether you choose a whetstone or handheld file. Work slowly and carefully as you sharpen, taking precautions for the sharp edges. Be patient, and don’t rush this important step.
Prep whetstone
If using a whetstone:
- Select a coarse gritstone to start sharpening and a finer stone for honing.
- Apply a few drops of lubricating oil to the whetstone surface. This prevents blade damage and improves results.
Secure the blade
- Firmly grip the blade edge up inside a towel or sharpening guide to hold it steady. This protects your fingers.
- Maintain a consistent 20-degree angle between the blade and the whetstone. Adjust your wrist accordingly.
Sharpening motions
- Use smooth, even, back-and-forth motions along the length of the blade edge.
- Apply light to moderate pressure as you sharpen. Let the whetstone do the work.
- Flip the blade and repeat on other edges, regularly wiping away metal residue.
Hone blade
- Switch to finer grit whetstone. Use lighter pressure and faster motions to refine the edge.
- Rinse the blade and check the edges. Further, sharpen if needed.
For handheld files:
- Insert the file into the blade curve and grip the handle firmly.
- Use smooth, even strokes across the entire blade edge.
- Repeat at a 20-degree angle on all blade edges until sharp.
Patience and the right motions are key to sharpening success. Take your time to get the blades back to peak sharpness.
Step 5: Check the Blades
After sharpening the blender blades, inspecting the edges thoroughly is important. Check for any remaining dull spots, uneven sections, nicks, or chips along the cutting edges. Addressing these issues ensures a smooth blending performance.
Inspect visually
Hold the blades to the light and slowly look along each sharp edge. Watch for any sections that still appear dull.

Feel the edges
Carefully feel along the blade edges with your fingers to detect any small bumps or uneven spots. This is the best test for checking sharpness.
Look for nicks and chips.
Examine the blade edges and tips closely for any small nicks or chips. These are common and will affect blending if left alone.
Deal with dull spots
Use the whetstone again with added pressure to sharpen out any remaining dull areas.
Smooth out nicks
For small nicks and chips, gently smooth the spots using a metal file. Take care not to take off too much metal.
Assess damage
If the blades are excessively damaged or warped, they likely need replacement instead of sharpening.
Proper inspection ensures your sharpening work removes all dullness and damage from the blades. Catching issues now prevents frustration later after reassembly.
Step 6: Reassemble the Blender
The final step after sharpening the blender blades is carefully reassembling the appliance. Taking your time to put all the parts back together properly will ensure your blender functions safely and efficiently.

Prepare blender base
- Unplug the blender base and make sure the power switch is off.
- Place a towel under the base to prevent slipping while reassembling the blades.
Insert blade assembly
Refer to your owner’s manual for how the specific blades fit into the blender jar. They often have small tabs that align into grooves.
Secure blades
- Place the screw cap over the blade assembly, aligning any tabs or arrows.
- Tighten the screws or bolts using your Phillips screwdriver until snug. Stay under-tightened.
Check blade spin
- Turn the assembled blender jar upside down.
- With your hand stabilized on a towel, carefully spin the blades to ensure they turn freely.
Reattach jar
- Place the jar onto the blender base, ensuring it is fully seated.
- Replug in the blender power cord.
Test blender
- Add water and a few ice cubes to the jar.
- Turn on the blender, starting at low speed, to check that the blades are functioning properly before full speed.
Take great care when reassembling to avoid injury from the sharp blades. But you can enjoy your freshly sharpened blender once it is back together correctly.

FAQs
Why Should I Sharpen My Blender Blades?
Sharp blender blades are essential for properly blending and mixing ingredients. Over time and with heavy use, blender blades naturally become dull. Dull blades cannot effectively chop and blend food and liquid to the right consistency. Using dull blender blades will result in chunky smoothies, uneven sauce textures, and longer blending times. Sharpening the blades restores their edges so they can easily slice through ingredients.
Sharpened blades will make smoothie and sauce textures silky smooth once more. Sharpening blender blades every six months to 1 year is recommended to keep your blender working in top condition.
What Tools Do I Need to Sharpen Blender Blades?
You don’t need expensive or specialized tools to sharpen most blender blades. Here are the basic supplies you’ll need:
- Whetstones – Coarse and fine-grained whetstones are essential for honing and polishing the blade edges.
- A light mineral oil – A light mineral oil helps lubricate the whetstones.
- Clean rag – For wiping down the blades.
- Kitchen towel – To hold the blades while sharpening.
- Phillips screwdriver – To remove the blades from the blender base.
Optional but helpful tools include a sharpening guide to hold the blades at the proper angle and a pair of pliers for removing any warped blades.
What Are the Steps to Sharpen Blender Blades?
Follow these key steps to sharpen your blender blades properly:
- Disassemble the blender and remove the blades. Refer to your blender’s manual for how to do this safely. Use a towel to grip the blades.
- Clean the blades thoroughly with hot, soapy water and dry well with a clean rag. Dirt and debris will interfere with sharpening.
- Secure the blade upside down in a sharpening guide or folded towel. This holds it safely at the proper angle.
- Lubricate the coarse gritstone with a few drops of mineral oil. Run the blade edge over the stone using smooth, even strokes. Sharpen each blade edge this way.
- Flip the blade over and repeat sharpening on the other edges. Frequently wipe clean with a rag.
- Switch to the fine-grit whetstone. Further, hone and polish the blade edges. Use lighter pressure.
- Carefully feel the blade edges to check how sharp they are. Repeat sharpening if needed.
- Clean the blades and whetstones when done. Reassemble the blender.
How Often Should Blender Blades Be Sharpened?
Most blender blades should be sharpened every six months to 1 year of regular use. Here are some signs it’s time to sharpen your blender blades:
- Food needs to blend smoothly, and there are lots of chunks.
- Blending times seem longer.
- You see lots of unchopped bits of food stuck to the blender jar.
- Blades seem duller and could be more shiny.
- Your blender needs to work harder and get hot during use.
If you make smoothies or use your blender daily, aim to sharpen the blades every six months. For light blender users, once a year is sufficient.
Can All Blender Blades Be Sharpened?
Nearly all standard blender blades can be sharpened, including those of stainless steel or coated metal. But there are a few exceptions:
- One-piece plastic blades cannot be sharpened. These inexpensive blenders must be replaced when the blades become dull.
- Some high-power blenders like Vitamix use thick, blunt blades that should not be sharpened. This risks damaging the precise blade angles.
- Ancient or damaged blender blades may be too warped or worn to sharpen properly. These blender bases likely need replacement.
Always check your blender manual first before attempting to sharpen replacement blades. If in doubt, contact the manufacturer.
What Precautions Should I Take When Sharpening Blender Blades?
Sharpening the exposed and razor-sharp edges of blender blades requires great care and precaution. Follow these safety tips:
- Wear cut-resistant kitchen gloves while handling the blades.
- Grip blades folded inside a towel when removing and reattaching to the blender.
- Lay blades flat on a stable surface protected by a towel when sharpening.
- Keep fingers clear of the blade edges at all times.
- Let blades fully dry before reassembling so they don’t slip.
- Take care to reinstall the blades correctly back into the blender base.
- Unplug the blender when doing any blade maintenance.
- Closely supervise children and do not let them handle blades.
Stay focused when sharpening, go slowly, and always put safety first when maintaining your blender blades.
Do I Really Need to Sharpen the Blender Blades, or Can I Replace Them?
It is possible to purchase new replacement blender blades when your old ones get dull. However, there are good reasons to take the time to sharpen the existing blades instead:
- Cost Savings – Replacement blades can cost $15-$60. Sharpening blades are inexpensive, with basic whetstones costing $10-$25.
- Reduce Waste – Sharpening extends the life of blades and their use, cutting down on metal and plastic waste from replacements.
- Better Results – New off-brand replacement blades may not perform or blend well with your original blades. Sharpening maintains their optimal angles.
- Quicker Process: It takes 15-30 minutes to sharpen blades versus ordering and waiting for replacements.
- Retain Performance – The sharpened original blades will retain the precise engineering of your blender model.
Replacing dull blades is certainly an option. But properly sharpening them is the more economical and sustainable choice for maintaining lender performance.
How Can I Prevent Blender Blades From Dulling Too Quickly?
You can help your blender blades retain their sharp edges longer through proper care and avoiding certain ingredients. Here are some tips:
- Avoid overloading – Overfilled blenders make blades work harder. Fill only to max lines.
- Skip ice crushing – Frequent ice blending will quickly dull metal blades. Use plastic blades for ice.
Blend hard items sparingly – Nuts, seeds, and coffee beans rapidly dull blades with prolonged use.
- Clean thoroughly – Rinse away sticky and crusty foods that can wear down blade edges.
- Balance loads – Distribute dense ingredients like ice evenly around blades for efficiency.
- Pulse don’t purée – Short pulses put less sustained stress on blades versus continuous puréeing.
- Replace worn parts – Worn blender gaskets allow blades to wobble, causing faster dulling.
With some care and avoiding overuse of the most damaging ingredients, your blender blades can retain their performance and sharpness for much longer between sharpenings.
Following these tips and techniques, you can successfully sharpen dull blender blades to peak performance. Investing just a small amount of time and effort into regular blade maintenance will keep your blender running smoothly for many blending tasks.
Related Video: Sharpening a Robot Coupe Food Processor Blade R602VV Stay Sharp
Final Words
Sharpening the blades on your blender is an inexpensive and easy way to restore its performance. With just a few basic tools and supplies, you can hone the edges of the blades back to a razor-sharp condition. Taking the time to sharpen the blades properly will give you smooth, lump-free mixtures again. Follow safety precautions when handling the detached blades, and take it slow and steady as you work. Proper blade maintenance is key for any blender to operate at peak efficiency. So grab your whetstones and get sharpening – treats like silky smoothies and perfectly pureed soups await! Keep those blender blades finely honed, and you’ll be whipping up fantastic concoctions in your newly renovated appliance in no time.